 airbrakecompressor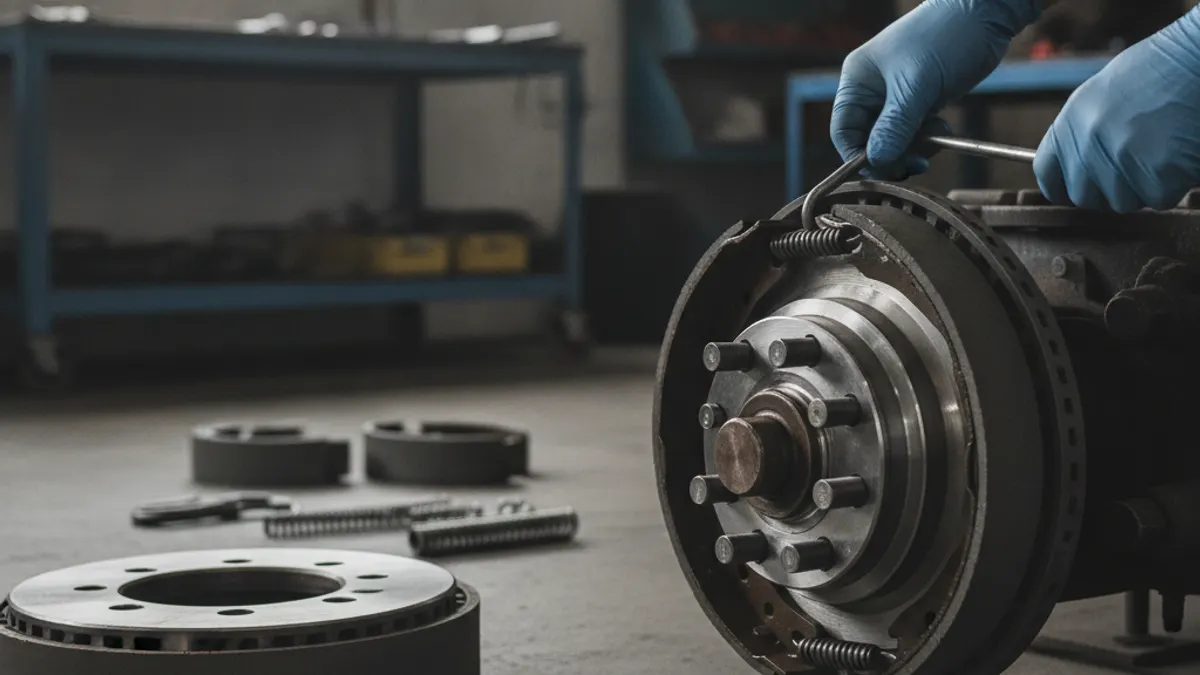
Replacing truck brake shoes on a standard S-cam air brake axle takes roughly two to four hours per axle with the right tools, and it is well within reach of a competent technician or owner-operator. The critical difference from a car brake job is that this is a pneumatic system with spring brakes: before anything comes apart, the wheels must be chocked, the system charged, and the spring brake chambers mechanically caged so the brake cannot apply while you work. From there it is a methodical sequence — back off the adjuster, pull the drum, inspect and replace hardware, fit the new lined shoes, set adjustment, and bed them in.
Work one axle end at a time and always replace shoes in complete axle sets. Mixing new linings on one wheel end with worn ones on the other guarantees a pull, uneven stroke, and a failed roadside inspection.
Before you start: safety and prep
Park on level ground, chock the wheels on an axle you are not working on, and run the engine until the governor cuts out — typically in the 120 to 135 psi range, with a healthy system sitting around 120 psi fully charged. At that pressure the spring brakes are fully released. Cage each spring brake on the wheel end you are servicing using the release bolt supplied with the chamber, and only then dump the air. Expect the low-air warning light and buzzer as pressure falls through roughly 60 psi; that is normal, not a fault.
Never strike, cut, or clamp a spring brake chamber. The power spring inside stores enough energy to kill. If a chamber will not cage, or the release bolt is seized, replace the chamber rather than fighting it. The full procedure is in our guide to caging a brake chamber.
Loosen the wheel nuts before jacking, support the axle on rated stands, and never rely on a jack alone. If the hub is oil-lubricated, have a drain pan and fresh hub oil ready — you will be replacing the wheel seal.
Tools and parts
- Lined shoe set for the whole axle, new or quality relined exchange
- Complete hardware kit: return springs, anchor pin bushings, rollers, retainer clips, cam bushings and seals
- New wheel seal, plus bearings if the old ones show wear or discoloration
- Brake spring tool, large pry bar, brass drift
- Torque wrench for the wheel-nut range and an inch-pound wrench for bearing adjustment
- Drum micrometer, lining thickness gauge, dial indicator for endplay
- Hub oil or bearing grease to the axle spec, brake cleaner, anti-seize
Step-by-step: S-cam shoe replacement
- Back off the slack adjuster. Turn the manual adjusting nut to retract the pushrod. On automatic slack adjusters, follow the manufacturer's direction and stated turn limits — forcing them backward past their design point damages the internal one-way clutch.
- Pull the wheel and drum. Remove the wheel assembly, then the hub cap or axle flange, and slide the drum and hub off as a unit if the hub is oil-lubricated. Catch the oil and support the hub so the bearings do not drop.
- Remove the old shoes. Release the return spring with the proper tool, lift the shoes off the anchor pins and away from the cam rollers. Note the orientation — leading and trailing shoes are often different part numbers or lining lengths.
- Clean and inspect. Wipe down the spider, check the anchor pins for grooving, and check the camshaft for radial play, spline wear, and dry or worn bushings. Replace cam bushings and seals while everything is open; that is the cheap part of the job.
- Fit new hardware. Install fresh anchor pin bushings, rollers, retainers, and return springs. Never reuse a stretched return spring — a weak spring drags the lining and cooks the drum.
- Install the shoes. Seat them on the anchor pins, position the rollers on the cam head, then fit the return spring last. Lightly lubricate the anchor pin and roller contact points with high-temperature brake lubricant, keeping every trace of it off the friction surface.
- Fit the drum and set the bearings. Install a new wheel seal, slide the hub and drum on, and adjust the bearings to the axle maker's procedure (TMC RP618 is the common industry reference), targeting roughly 0.001 to 0.005 in of endplay. Refill hub oil to the sight-glass line, or repack to spec.
- Adjust the brake. Turn the adjuster until the shoes just contact the drum, then back off until the drum turns free with minimal drag. Details in how to adjust a slack adjuster.
- Reassemble and torque. Mount the wheels and torque the nuts to the OE value — commonly in the 450 to 500 lb-ft range for hub-piloted assemblies — in the correct star pattern, then uncage the spring brakes before the truck moves. Re-torque after 50 to 100 miles.
What to inspect while the drum is off
Half the value of this job is the inspection. New shoes running against a bell-mouthed drum or a sloppy camshaft will wear fast and brake unevenly.
| Component | What to look for | Action |
|---|---|---|
| Lining thickness | Many fleets pull shoes at about 1/4 in (6 mm) remaining; the regulatory floor under FMCSA 393.47 is lower and varies by lining type | Replace in axle sets |
| Drum inside diameter | Compare to the discard dimension cast or stamped into the drum (commonly nominal plus 0.080 in) | Replace if at or over the limit |
| Drum out-of-round / taper | Typically limited to around 0.010 in; verify against the drum maker's figure | Machine within limits or replace |
| Drum surface condition | Fine heat checking is normal; cracks reaching an open edge or running through the friction surface are not | Replace the drum |
| Camshaft and bushings | Any perceptible wobble, dry bushings, worn splines, damaged seals | Rebush and reseal |
| Anchor pins and rollers | Grooving, flat spots, seized rollers | Replace with the hardware kit |
| Brake chamber and pushrod | Torn boot, bent rod, corroded clevis, leaking chamber | Replace chamber or clevis |
| Wheel seal and bearings | Oil on the lining, discolored or spalled rollers | Always a new seal; bearings as found |
If the drum is worn past its discard dimension, replace it — machining an already-thin drum leaves too little mass to absorb heat. More on selection and wear patterns in our page on truck brake drums.
Check pushrod stroke before the truck rolls
After adjustment, have a helper make a full application at around 90 to 100 psi with the engine off, and measure pushrod travel from released to applied. Stroke already near the limit on a freshly relined brake means something else is wrong — a dragging cam, a wrong shoe or drum combination, or a slack adjuster that needs replacing.
| Chamber type | Rated stroke | Readjustment limit |
|---|---|---|
| Type 20 | Standard | 1-3/4 in |
| Type 24 | Standard | 1-3/4 in |
| Type 24 | Long stroke | 2 in |
| Type 30 | Standard | 2 in |
| Type 30 | Long stroke | 2-1/2 in |
These figures mark the point at which the brake is out of adjustment, not a target — a freshly adjusted brake should sit well under the limit. Confirm the figure listed for the exact chamber fitted before you sign the job off.
Bed-in and follow-up
New linings do not deliver full torque until they have conformed to the drum. Make a series of light to moderate stops over the first 100 to 200 miles, allowing cooling between them, and avoid hard or prolonged braking in that window. Expect a slight change in pedal feel and stopping distance until the shoes are seated.
Re-torque the wheel nuts after the first 50 to 100 miles, recheck pushrod stroke, and check the hub oil level. Friction material choice matters as much as the procedure — specify the shoe set by the edge code the axle was certified with, cross-referenced to the drum and chamber combination it was built with, and keep that code identical on both wheel ends, which keeps stroke, wear rate, and stopping torque consistent side to side.
Common mistakes
- Reusing tired return springs or worn anchor bushings with new linings
- Skipping the cam bushing while the wheel end is already apart
- Letting grease or brake lubricant reach the friction surface
- Hand-adjusting an automatic slack adjuster to chase long stroke instead of finding the fault
- Doing one wheel end only, then chasing a pull afterwards
- Forgetting to uncage the spring brakes before the truck moves

Need the part, not just the answer?
OE-grade air brake compressors and repair kits, manufactured and tested to commercial-vehicle standards.
Shop VADEN partsPublished by VADEN Original. Product links point to the manufacturer’s official catalogue. Specifications are general — always confirm figures against your vehicle’s service manual.