 airbrakecompressor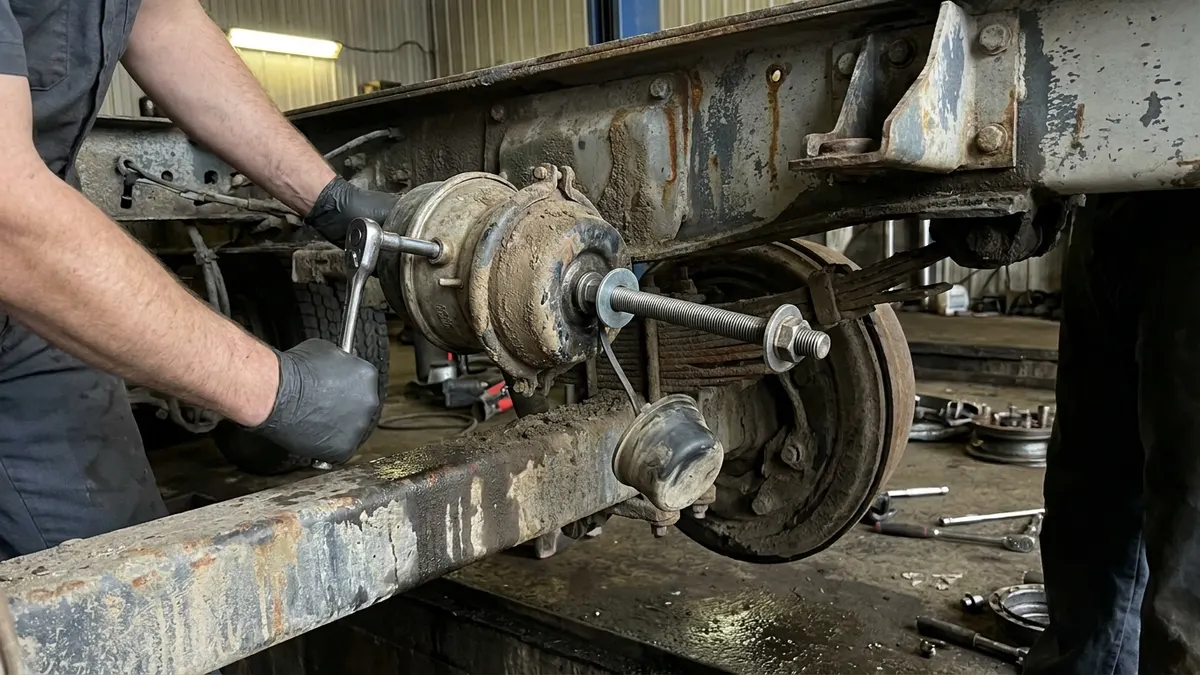
To cage a brake chamber, you insert the release stud (caging bolt) into the back of the spring brake, seat it against the internal pressure plate, and turn the nut with a wrench to mechanically wind the power spring back — this releases the parking brake without any air in the system. You cage a chamber when a truck can't build air and has to be moved or towed, or before you pull a chamber off for replacement. Before you touch anything, chock the wheels, because a caged axle has no parking brake holding it in place.
A spring brake (the parking/emergency side of a combination chamber) works backwards from the service brake. Air pressure holds the big power spring compressed and the brake released. Bleed the air off — or lose it to a leak — and that spring shoves the pushrod out and applies the brake. That is the fail-safe design: no air means the truck parks itself. Caging is how you temporarily override that fail-safe by hand.
When You Need to Cage a Chamber
You do not cage brakes casually. There are really only two legitimate reasons:
- Moving or towing a dead vehicle. A compressor failure, a blown air line, or a chamber that won't release leaves the spring brakes locked. If you can't get the system charged, caging frees the wheels so the truck can roll onto a flatbed or out of a traffic lane.
- Servicing the chamber. Before you unbolt a spring brake to replace it, you cage the spring so it can't fire while your hands are near the clamp band. This is standard practice in any brake chamber replacement.
If the truck can still build and hold air, the right move is almost always to charge the system and let the brakes release normally — not to cage them. Caging is a workaround, not a repair.
Tools You Need
Caging takes very little hardware, and most of it lives on the chamber itself.
| Item | Purpose |
|---|---|
| Release stud / caging bolt kit | The T-shaped or straight bolt, washer, and nut that wind the spring back. Ships clipped to the side of every spring brake. |
| Wheel chocks | Hold the vehicle once the parking brake is released. |
| Wrench or deep socket (typically 3/4") | Turns the caging nut. Check the manufacturer's spec for the exact size. |
| Ratchet with extension | Reaches the nut and lets you feel when the spring is fully wound back. |
| Gloves and eye protection | Basic PPE around a spring-loaded assembly. |
Most spring brakes carry their own release stud in a small clip or pocket molded into the chamber body. If it is missing, buy the correct kit for that chamber — do not substitute a random bolt, because thread pitch and length are specific to seating the pressure plate.
How to Cage a Spring Brake Chamber: Step by Step
- Chock the wheels. Front and back of at least one tire on the axle you are not caging. Once the spring brake is released, nothing mechanical holds the truck.
- Drain or confirm air is off the spring side. If the system still has pressure, apply and hold the parking control or bleed the reservoir per the manufacturer's procedure so the spring is seated. Caging against full air pressure is unnecessary and fights the tool.
- Remove the cap or plug from the release stud opening in the center of the chamber's back (the spring-side dome).
- Insert the release stud through the opening. Push it in and give it a quarter turn so the T-bar or tangs seat into the slot on the internal pressure plate. Pull back lightly — it should catch and not slide out.
- Fit the washer and nut over the stud on the outside of the chamber.
- Turn the nut clockwise with your wrench. As you tighten, you are drawing the pressure plate back and compressing the power spring, pulling the pushrod in and releasing the brake.
- Stop at the manufacturer's spec. Most chambers fully cage within roughly three inches of stud travel, and many specs cap the caging nut near 50 ft-lb of torque. Do not keep cranking past the point the spring is fully compressed — you can strip the stud or damage the plate.
- Confirm the brake released. The slack adjuster and pushrod should be pulled fully back. On a caged axle the wheel now turns freely.
When you are done with the tow or the repair and air is restored, you reverse the process: charge the system so the service side holds, then back the caging nut off, remove the stud, reinstall the plug, and clip the stud back on the chamber for next time.
Safety Cautions That Actually Matter
The power spring inside a spring brake stores enough energy to cause serious injury or death if it is released uncontrolled. Treat every spring brake chamber as loaded.
Read these before you turn a wrench:
- Never disassemble a spring brake chamber. Do not remove the clamp band, do not drill it, and never cut or torch it. A trapped compressed spring turned into a projectile is a well-documented cause of shop fatalities.
- Cage before you remove. Any time you pull a spring brake off an axle, it must be fully caged first so the spring can't fire while the chamber is loose.
- Watch for a corroded or damaged stud. If the caging bolt threads are rusted or the stud won't seat, stop. A stud that lets go under load is dangerous. Replace the chamber as a sealed unit — see how the brake chamber is built as a non-serviceable assembly.
- Don't drive on caged brakes. A caged axle has no emergency or parking brake on that wheel. Cage only to move a vehicle short distances or load it for tow — never to keep running a truck in service.
- Chock, always. This is worth repeating because it is the step people skip. If you understand how the parking side ties into the whole system, review how spring brake parking brakes work and why removing that hold requires the wheels blocked.
Caging vs. Fixing the Real Problem
Caging gets a stuck truck rolling, but it does not fix why the brakes wouldn't release. If a chamber won't come off the brakes when the system is charged, or the spring brake applied on its own, the underlying cause is usually a leak, a failed chamber diaphragm, a supply-valve fault, or a worn-out spring brake. Once the vehicle is safe, run down the actual failure — a chamber that won't release on air is a replacement, not a permanent cage job. Quality OE-grade parts matter here; sourcing chambers and valves from a proper air brake system components catalog keeps the fail-safe design working the way it should.
Bottom line: caging is a controlled, temporary override of a safety mechanism. Done right — wheels chocked, correct stud seated, nut turned to spec — it is a routine roadside and shop task. Done wrong, or turned into disassembly, it is one of the most dangerous things you can do around a truck.
Source (VADEN Original): Brake Chamber Types and Sizes: Choosing T, DD and Spring Chambers

Need the part, not just the answer?
OE-grade air brake compressors and repair kits, manufactured and tested to commercial-vehicle standards.
Shop VADEN partsPublished by VADEN Original. Product links point to the manufacturer’s official catalogue. Specifications are general — always confirm figures against your vehicle’s service manual.