 airbrakecompressor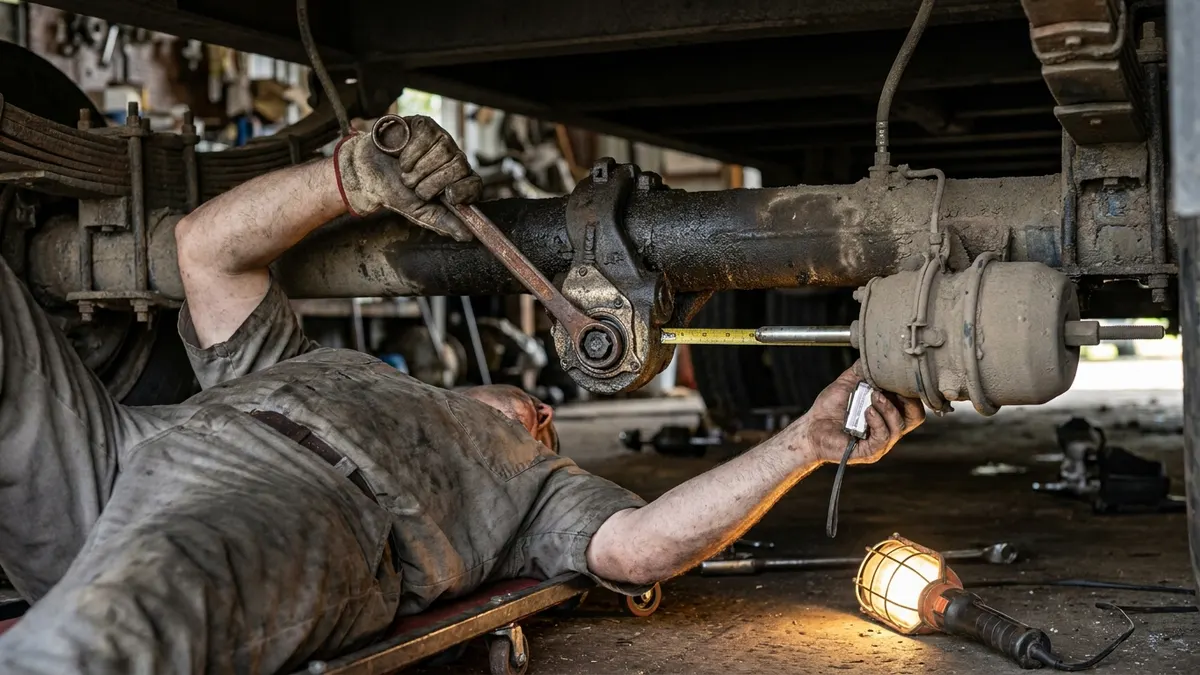
To adjust a slack adjuster you first measure the applied pushrod stroke: chock the wheels, charge the air system to about 120 psi, mark the pushrod, have someone make a full brake application, and measure how far the rod travels. If that travel exceeds the legal limit for the chamber size, a manual slack adjuster is corrected by turning its adjusting bolt to bring the shoes closer to the drum. An automatic slack adjuster that is out of stroke is telling you something is worn out — the fix is diagnosis and replacement, not repeated hand-adjustment.
Slack adjusters are the lever arm between the brake chamber pushrod and the S-cam that spreads the shoes. As linings wear, the arm has to swing farther to apply the brakes, and pushrod stroke grows. Too much stroke means the pneumatic chamber runs out of travel before the shoes are fully seated — that is how trucks lose braking force and fail inspections. Understanding this is core to how air brake systems work.
Manual vs. automatic slack adjusters
Before you touch anything, identify which type you have. Since the mid-1990s, virtually all North American commercial vehicles are required to run automatic slack adjusters (ASAs), but manual units still appear on older equipment, trailers, and off-highway machines.
| Feature | Manual slack adjuster | Automatic slack adjuster (ASA) |
|---|---|---|
| Adjustment | Set by hand at each service interval | Self-adjusts on every full brake application |
| Appearance | Plain adjusting bolt, no clutch mechanism | Adjusting hex plus an internal clutch/actuator arm linked to the axle |
| Correct response to over-stroke | Adjust the bolt | Investigate and repair/replace — do not routinely hand-adjust |
| Typical use | Legacy trucks, older trailers | Nearly all modern tractors, trailers, buses |
This matters because manually cranking an ASA back into spec is one of the most common mistakes in the yard. If an ASA is showing long stroke, the clutch, the internal gearing, the chamber, or the foundation is worn — hand-adjusting hides the fault until the next inspection or the next hill.
Step 1: Measure applied pushrod stroke
Stroke is measured, not guessed. You need a ruler or tape and a helper (or an applied-and-hold method with the spring brakes released).
- Park on level ground, chock the wheels, and build the system to full pressure (around 120 psi), then shut the engine down.
- Release the parking (spring) brakes so the chamber is fully retracted.
- Mark the pushrod where it exits the chamber at rest, or measure from the chamber face to a fixed point on the rod.
- Have your helper make and hold a full brake application (roughly 90–100 psi at the treadle).
- Measure the pushrod again. The difference between released and applied is your applied stroke.
Measuring at a full application matters — a light tap understates the travel and will pass a chamber that is actually over the limit. The chamber and pushrod are described on the brake chamber page.
Step 2: Compare against the readjustment limit
Every chamber size has a maximum allowable applied stroke. Exceed it and the brake is out of adjustment; on a roadside inspection, enough out-of-adjustment brakes on one vehicle is an out-of-service (OOS) condition under CVSA rules. Use the values stamped or documented for your specific chamber — the figures below are common reference points, not a substitute for the manufacturer spec.
| Chamber type | Style | Common readjustment limit (applied stroke) |
|---|---|---|
| Type 20 | Standard stroke | ~1 3/4 in |
| Type 24 | Standard stroke | ~1 3/4 in |
| Type 24 | Long stroke | ~2 in |
| Type 30 | Standard stroke | ~2 in |
| Type 30 | Long stroke | ~2 to 2 1/2 in |
Long-stroke chambers are usually identified by a square or hex-shaped port boss and a marking on the housing. Mixing them up will make you condemn a good brake or pass a bad one, so confirm the chamber type before you read the limit.
Step 3: Adjust a manual slack adjuster
If — and only if — you have a genuine manual unit that is over the limit, adjust it as follows:
- Keep the wheels chocked and, if the spring brakes are applied, cage them so the shoes are fully released.
- Find the adjusting bolt on the slack adjuster. On many designs a locking collar or sleeve must be depressed before the bolt will turn.
- Turn the bolt to run the shoes out toward the drum until you feel firm drag and the wheel will not turn by hand.
- Back the bolt off roughly a quarter to a half turn — follow the maker's spec — until the wheel spins freely with only light drag.
- Re-measure applied stroke. It should now sit well within the limit.
- Repeat wheel by wheel and confirm both sides of an axle match; uneven adjustment causes the truck to pull when braking.
Never adjust a slack adjuster to compensate for badly worn linings, an out-of-round drum, or a weak chamber. Adjustment restores clearance; it does not fix worn foundation parts.
Step 4: When adjustment is the wrong answer
Long stroke on an ASA, stroke that returns within days of adjustment, dragging brakes, or one wheel that never comes into spec all point to a component problem rather than an adjustment problem. Check for:
- A failed automatic slack adjuster (worn clutch, seized gearing, or a broken link to the anchor).
- Worn or contaminated shoes and linings, or a worn S-cam and bushings.
- A weak or leaking chamber diaphragm that isn't developing full travel.
- A frozen or corroded camshaft that binds the return.
In these cases, replace the failed part. Repeated hand-adjustment of an ASA is a documented citation item and a real safety hazard.
Safety and torque notes
Always work with the system fully charged, wheels chocked, and spring brakes handled deliberately — a released spring brake can apply if pressure bleeds off toward the low-air range (around 60 psi). Torque the adjusting hardware and any anchor bolts to spec, verify free wheel rotation, and finish with a full-pressure application test before the vehicle moves. If pushrod angle, clearance, or the anchor look wrong, stop and inspect the foundation rather than chasing the number at the bolt.
Done right, a slack adjuster check takes a few minutes per wheel and is one of the highest-value inspections on an air-brake vehicle. Done wrong — by masking a worn ASA — it is exactly how a truck ends up out of service on the side of the road.
Source (VADEN Original): How Does an Automatic Brake Slack Adjuster Work?

Need the part, not just the answer?
OE-grade air brake compressors and repair kits, manufactured and tested to commercial-vehicle standards.
Shop VADEN partsPublished by VADEN Original. Product links point to the manufacturer’s official catalogue. Specifications are general — always confirm figures against your vehicle’s service manual.