 airbrakecompressor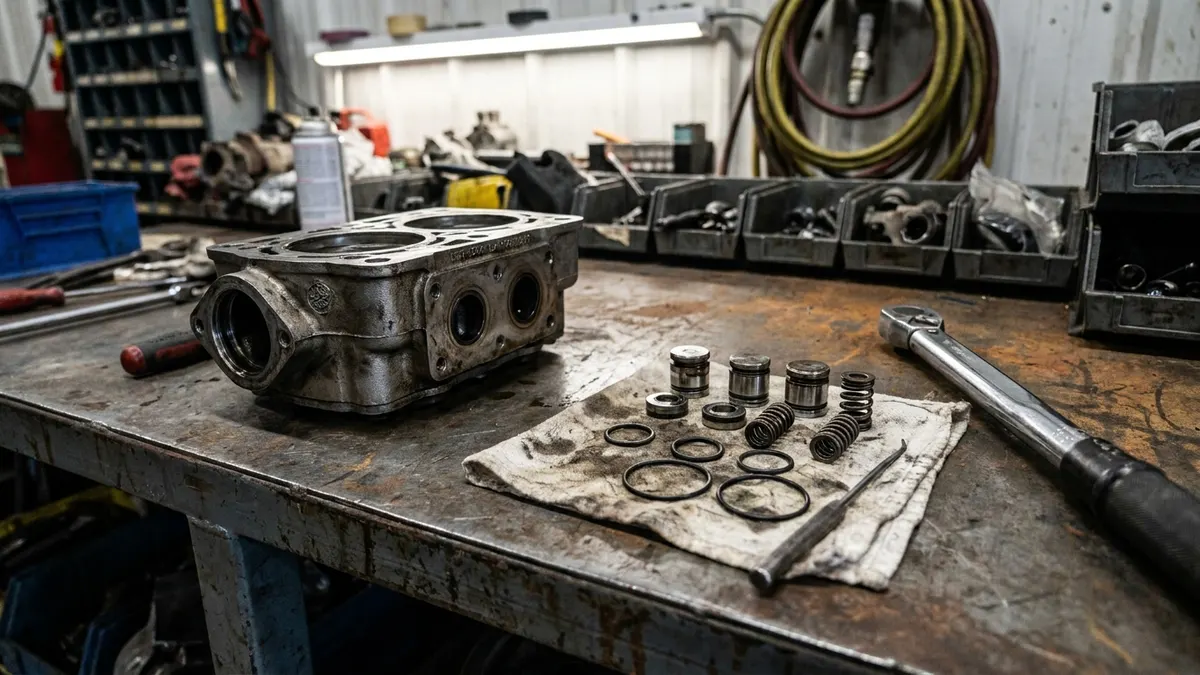
To choose the correct unloader kit, work from the compressor rather than the truck: find the OE part number and casting number on the crankcase and cylinder head, confirm the cylinder count and head type, then match the kit to that exact head. An unloader kit contains only the unloading mechanism - plungers or unloader pistons, seals, return springs and caps - while a repair kit adds intake and discharge valves, gaskets and usually piston rings. If the compressor builds pressure normally but will not stop pumping at governor cut-out, or hisses continuously from the head once cut-out is reached, the unloader kit is the smaller and usually correct repair.
What the unloader does, and why the kit matters
An air brake compressor is driven off the engine and never switches off. It switches between loaded and unloaded. When reservoir pressure reaches governor cut-out - typically in the 120-135 psi band depending on the vehicle - the governor sends a pneumatic signal to the compressor's unloader port. That signal pushes the unloader plungers down, holds the intake valves off their seats, and the compressor shuttles air back and forth instead of pumping it into the system. When pressure drops to cut-in, generally 100-110 psi, the governor exhausts the signal, the springs lift the plungers and pumping resumes. A healthy system settles around 120 psi fully charged.
Everything in that cycle depends on a few small parts: a plunger that slides freely in its bore, an O-ring that holds the signal air, and a spring strong enough to return the plunger. When those wear, the compressor either never unloads (running hot, pushing oil and overworking the air dryer) or unloads permanently and never builds. The mechanism itself is covered in more detail on our page on the compressor unloader valve.
Related guides: How to Replace an Air Compressor Unloader Kit on the Bench
Step 1: Prove the unloader is the fault
Before ordering anything, rule out the cheaper causes. Technicians replace a lot of good unloader parts because the real problem sat upstream:
- Governor. If cut-out never happens, the compressor was never told to unload. Check that the governor actually switches within its normal band before touching the head.
- Signal line. The small line between governor and compressor collects water, oil and ice. A crushed, plugged or frozen line delivers no signal.
- Discharge line. Heavy carbon build-up raises back pressure and makes a compressor behave as though it cannot unload cleanly.
- Leaks. A system bleeding air will cycle constantly and never reach cut-out; that is a leak problem, not an unloader problem.
Only when the governor signal arrives at the port and the compressor still refuses to unload does the kit become the answer.
Step 2: Identify the compressor exactly
Two compressors that fit the same engine can take different unloader parts. Record all of the following before you order:
- OE part number stamped or cast into the crankcase, plus the head casting number - the head is what the kit has to fit.
- Manufacturer of the original unit (Bendix, Wabco/ZF, Knorr-Bremse and the truck OEM numbers all cross-reference).
- Single or twin cylinder, and whether the head is air-cooled or water-cooled.
- Number and position of unloader bores - some heads use one crossover plunger, others a plunger per cylinder.
- Unloader bore diameter and plunger length, measured off the old parts where possible.
- Whether the unit is a plain governor-signalled compressor or an energy-saving/clutched design, which uses a different control arrangement.
Match on the casting first, then confirm against the vehicle application - never the other way round. When a supplier lists parts by engine only, ask for the compressor number the kit was built against. Complete OE-grade unloader valve and unloader kit ranges are catalogued this way, by compressor reference, which is the safest way to buy.
Step 3: Unloader kit or repair kit?
This is where most of the money is either saved or wasted. The table below shows what each level of kit normally covers and when it is the right choice.
| Kit level | Typical contents | Choose it when |
|---|---|---|
| Unloader kit | Unloader plungers or pistons, O-rings and seals, return springs, caps or plugs, retaining clips, small gaskets | Compressor builds and holds pressure but will not unload at cut-out, or leaks from the head while unloaded |
| Valve and head gasket kit (top end) | Intake and discharge valves, valve springs, valve plate and head gaskets, seals; often includes the unloader parts | Slow build-up, very hot discharge line, air blowing back through the inlet |
| Full repair kit | All of the above plus piston rings, crankcase and base gaskets, shaft seals, sometimes bearings | High-hour unit, oil carry-over, weak output, or the compressor is already off the engine and on the bench |
| Complete compressor | New or remanufactured assembly, usually with gaskets | Scored bores, cracked head, worn crank or bearings, or downtime costs more than bench time |
Kit naming is not standardised between suppliers, so read the parts list rather than the label - our breakdown of what comes in an air compressor repair kit shows how the levels usually stack up.
Step 4: Check quality and fit details
Two kits with the same reference are not always equal. Look at:
- Seal material. Unloader seals sit close to discharge heat. Higher-temperature elastomers last; cheap general-purpose O-rings harden and leak.
- Plunger finish and dimensions. Compare the new plunger to the old one for length, diameter and seat profile. A plunger that sits slightly too short will not hold the intake valve open reliably.
- Spring rate. A weak return spring leaves the compressor partly unloaded and slow to build.
- Completeness. Confirm the kit includes the head gasket you will disturb during the job. Reusing a gasket to save an hour is a false economy.
- Bore condition. Inspect the unloader bore before fitting. If it is scored or pitted, new seals will leak just like the old ones and the head needs replacing.
When a kit is the wrong answer
An unloader kit fixes a control problem, not a wear problem. If the compressor is passing oil into the discharge line, has lost compression, or has already been through one overhaul, fitting a small kit buys weeks rather than years. Weigh the labour of pulling and rebuilding against a replacement unit - the comparison is laid out in our guide on rebuilding versus replacing an air compressor. After any repair, run the vehicle up and confirm the governor cuts out and cuts in within its normal band, the compressor goes quiet when unloaded, and the system holds pressure with the engine off.

Need the part, not just the answer?
OE-grade air brake compressors and repair kits, manufactured and tested to commercial-vehicle standards.
Shop VADEN partsPublished by VADEN Original. Product links point to the manufacturer’s official catalogue. Specifications are general — always confirm figures against your vehicle’s service manual.