 airbrakecompressor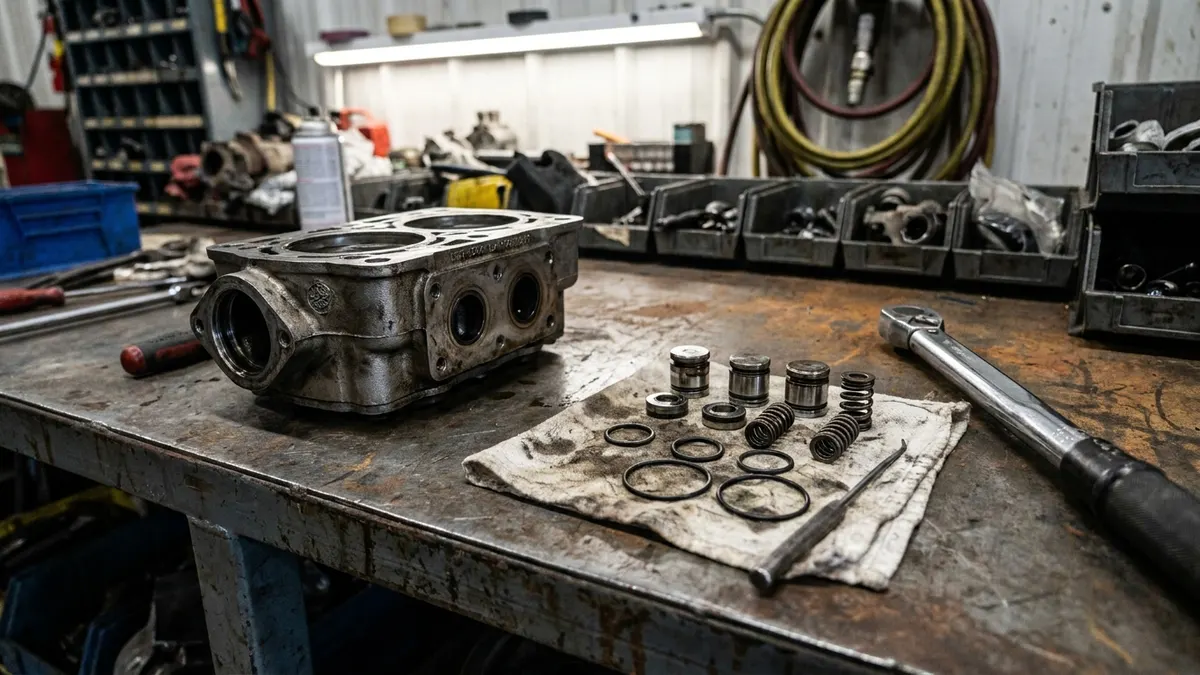
An air compressor cylinder head gasket kit is the set of seals that keeps three separate circuits apart inside the compressor head: incoming intake air, high-temperature discharge air on its way to the air dryer, and engine coolant on water-cooled units. When the gasket fails, one of those circuits crosses into another — coolant into the air system, compressed air into the cooling jacket, or discharge air short-circuiting back to the intake so the compressor never builds pressure the way it should. The gasket itself is cheap; the repair only holds if the head and deck are clean and flat and the fasteners go back down in the right sequence and stages.
What the head gasket actually seals
On a typical heavy truck compressor the cylinder head carries the inlet and discharge valve assemblies, the discharge port, and — on water-cooled designs — coolant galleries plumbed into the engine cooling system. The gasket (composite or multi-layer steel, sometimes paired with a separate valve plate gasket) has to hold four different boundaries at once:
- Discharge to atmosphere — the hottest joint on the compressor, right at the discharge port.
- Discharge to intake — the divider that stops pumped air from bleeding straight back to the inlet side.
- Coolant to air — the ring lands around each coolant passage.
- Coolant to atmosphere — the external coolant joint at the head face.
Air brake systems are pneumatic, so anything that gets past those lands ends up downstream in the tanks and valves rather than in a fluid circuit. That is why a coolant-side breach shows up as contamination in the wet tank and, eventually, at every valve the air touches.
Why compressor head gaskets fail
Heat does most of the damage. Discharge air leaves the head extremely hot, and anything that traps that heat attacks the gasket at the discharge port first. The usual causes, in rough order of how often they turn up:
- Restricted discharge line. Carbon narrows the discharge tube and drives head temperature up. If the line is coked, the replacement gasket will not last either — see discharge line carbon buildup.
- Poor coolant flow. A kinked coolant hose, a plugged gallery or old, scaled coolant leaves the head running hot even when the engine gauge looks normal.
- Warped or eroded head. Repeated heat cycles pull the head out of flat, or steam erosion cuts a channel between a coolant land and the discharge port.
- High duty cycle. A compressor loaded most of the time — leaks in the system, an air suspension that never settles, an unloader that will not release — runs hotter than one that cycles normally.
- Assembly error. Reused gasket, dirty deck, wrong gasket orientation, uneven or under-torqued fasteners, or sealant smeared on a gasket that was never meant to have it.
Reading the symptoms
| What you see | What it usually means | First check |
|---|---|---|
| Coolant loss with no external leak; milky or emulsified condensate in the wet tank | Coolant gallery breached into the air passage | Drain the wet tank and inspect the condensate; pressure-test the cooling system with the compressor plumbed in |
| Surge tank pressurizes quickly, coolant pushed into the overflow | Compressed air leaking into the coolant jacket | With the system cool, watch the surge tank for bubbles while the compressor is loaded |
| Slow build, long time to governor cut-out (typically 120-135 psi) | Discharge air bleeding back to the intake past the gasket or a failed valve | Run a build-up time test and listen at the intake for pulsing air |
| Hiss or chuffing at the head-to-block joint under load | External blow-out at the discharge land | Soap the head joint with the compressor loaded |
| Oil in the discharge line, dryer purging oily | More often rings, drain-back or duty cycle than the head gasket | Diagnose separately — see air brake compressor pumping oil |
| Water in the tanks with no coolant loss | Air dryer or drainage issue, not the gasket | Check the dryer and purge cycle before opening the compressor — see water in air tanks |
What a cylinder head gasket kit includes
Contents vary by compressor family, but a head gasket kit is normally built around the joints you disturb when the head comes off:
- Cylinder head gasket (and the valve plate gasket where the design uses a separate plate)
- Head cover or top cover gasket
- Coolant port O-rings, grommets or seal rings
- Inlet and discharge valve components on kits that bundle them — discs, springs and seats
- Unloader piston seals and O-rings when the unloader sits in the head casting
Do not confuse it with a full overhaul kit, which adds piston rings, bearings, base gaskets and the rest. Kits are cataloged against the OE compressor family — Bendix, Knorr-Bremse, Wabco/ZF, and OEM units fitted to Cummins, Detroit, Mercedes, Volvo and DAF engines — so match the compressor casting number rather than the truck. VADEN Original lists head and overhaul sets by compressor family in its air brake compressor repair kits range.
Reassembly: surfaces first, torque second
Most repeat failures are made during assembly, not during service.
- Clean without gouging. Scrape carbon and old gasket material with a plastic or brass scraper. Scoring the aluminum head or the deck creates the leak path you are trying to close.
- Check flatness. Lay a straightedge across the head face in both directions and diagonally, and check with a feeler gauge against the manufacturer's limit. A head outside limit gets resurfaced or replaced — a new gasket will not span it.
- Inspect the valve seats and plate. Pitted or grooved discharge seats keep the head hot even with a fresh gasket.
- Fit the gasket dry and the right way round. Multi-layer and coated gaskets are installed without sealant unless the service data specifically calls for it, and many have a marked top face and asymmetric ports.
- Torque in stages, center outward. Clean threads, correct lubricated-or-dry condition per the spec, then roughly a third, two thirds, then full value in a crisscross pattern working out from the center. Use the OEM torque figure for that compressor — head fastener values differ widely between families and are not worth guessing at.
- Clear the discharge path. Replace or clean a carboned discharge line and confirm the coolant lines flow before you call it done.
Some manufacturers specify a re-torque after a heat cycle. If the service data calls for it, do it — that is usually the difference between a gasket that lasts and one that weeps at the discharge land in a month.
Verifying the repair
Run the engine and let the system charge. The governor should cut out in the 120-135 psi range and cut back in around 100-110 psi, with a fully charged system sitting near 120 psi. Time the build between the pressures your OEM specifies and compare against the published figure — a compressor that still builds slowly has another fault. Then confirm the safety layer still behaves: the low-air warning should come on around 60 psi as the system bleeds down, and the spring brakes should apply somewhere in the 20-45 psi band. Finally, drain the tanks after a day or two of service and check the condensate. Clean water is normal condensation; anything oily or coolant-tinted means the job is not finished.

Need the part, not just the answer?
OE-grade air brake compressors and repair kits, manufactured and tested to commercial-vehicle standards.
Shop VADEN partsPublished by VADEN Original. Product links point to the manufacturer’s official catalogue. Specifications are general — always confirm figures against your vehicle’s service manual.