 airbrakecompressor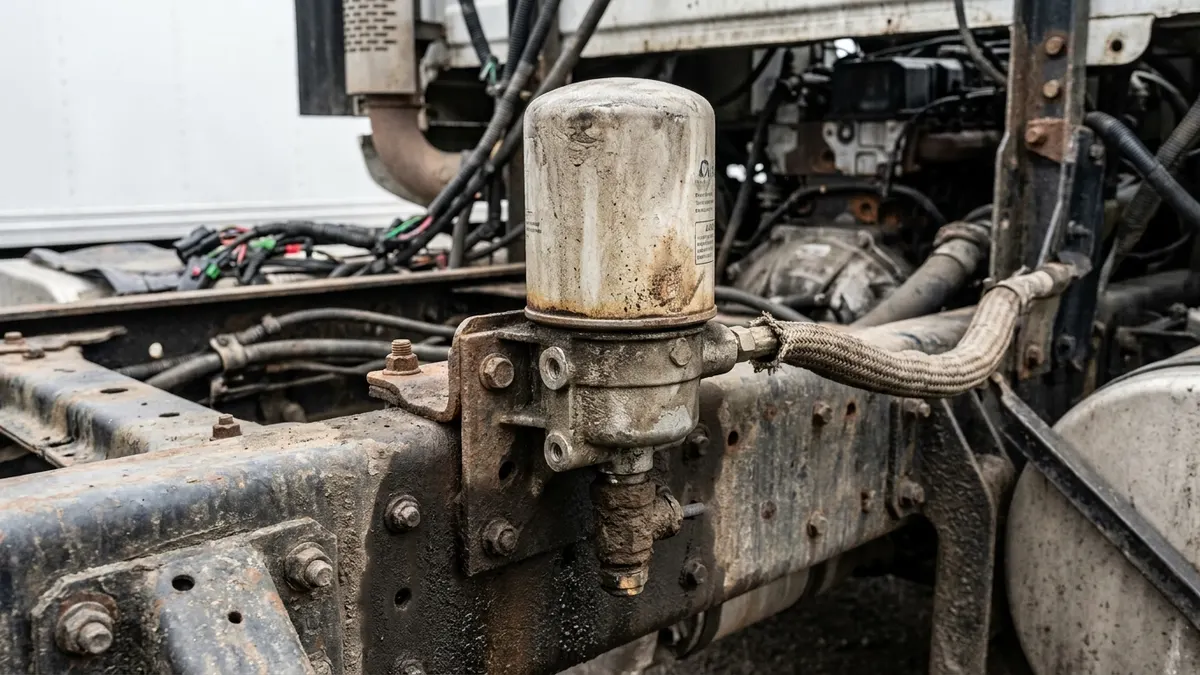
To cross-reference an air dryer by OE number, start with the number on the dryer's data tag or cast into the housing, then confirm the replacement matches on five physical points: port count and thread type, heater voltage and connector, purge design (integral purge volume versus a remote purge tank), mounting bracket and orientation, and the cartridge interface. The number gets you to a short list of candidates; those five points prove the part. Most trucks carry two numbers - the vehicle manufacturer's assembly number and the dryer manufacturer's own service number - and any given interchange table is built around one of them, not both.
Where the numbers live on the unit
Before anything comes off the frame rail, photograph the dryer from four sides with the lines and wiring still attached. That single habit saves more comeback trips than any catalogue. Then look for:
- The data tag or label on the housing. This usually carries the dryer maker's part number, a build date and often the heater voltage.
- Cast or stamped numbers in the aluminium body. These are frequently casting or family numbers rather than the service number, but they identify the design family - which is enough to start a cross-reference.
- The vehicle OEM number from the parts book. Truck makers such as Mercedes-Benz, Volvo, DAF, MAN, Scania, Iveco, Freightliner and Kenworth assign their own numbers to the same base unit supplied by Bendix, Wabco/ZF, Knorr-Bremse, Haldex or Meritor.
- The cartridge number printed on the desiccant can. It identifies the cartridge only. Using it to order a complete dryer is the single most common cross-reference error.
- A piggy-back governor, where fitted. It has its own part number and is often sold separately from the dryer body.
What an OE number does and does not prove
An OE number tells you what the truck left the factory with. It does not tell you what is bolted to the chassis today, and it does not guarantee that one number equals one hardware configuration. Numbers supersede when a manufacturer revises a purge valve, changes heater wattage or switches a port thread. Some OEM numbers cover a whole kit - dryer, bracket, sometimes the discharge line - while the equivalent supplier number covers the bare unit. And two trucks with the same engine can leave the line with different dryers depending on build market, cab type and whether the chassis was specified with a separate regeneration tank. Treat the number as a lookup key, then verify against the hardware. A background on how the unit functions in the circuit is covered in our overview of the air dryer on a truck air brake system.
The fitment points that decide the job
| What to match | Why it matters | How to check |
|---|---|---|
| Port thread type and size | North American units are commonly NPT; European units are typically metric (M16 x 1.5, M22 x 1.5). Mixing them destroys threads. | Thread gauge on the old unit, or match the existing fittings. |
| Number and function of ports | Inlet, delivery, control (governor signal), purge and, on some units, a separate regeneration port. A missing control port makes the unit unusable. | Count ports and label each line before removal. |
| Heater voltage and connector | 12 V and 24 V heaters can sit in identical housings. The wrong one fails and the purge valve freezes in winter. | Read the tag; confirm resistance against the published spec with a meter. |
| Purge design | Single-cartridge units with an internal purge volume are not interchangeable with designs that regenerate from an external purge tank. | Look for a dedicated purge/regeneration line on the chassis. |
| Cartridge interface | Spin-on versus clamped/bolted cartridges, and thread size, vary by family. Determines what the fleet stocks afterwards. | Inspect the cartridge base and its thread. |
| Mounting and orientation | Bolt pattern, bracket offset and whether the unit hangs vertically or at an angle affect line reach and drainage. | Offer the bracket up before returning the core. |
| Integrated governor | Some dryers carry the governor on the body; others take a signal from a frame-mounted governor. | Trace the control line back to its source. |
| Working pressure and cut-off features | The unit must suit a system that cuts out in the 120-135 psi band, and any turbo cut-off feature must match the original. | Compare tag rating and port layout. |
Cartridge or complete dryer?
Change the cartridge when the housing is sound, the purge valve seals, the heater works and you are simply on interval or dealing with normal desiccant saturation - water in the tanks, damp purge discharge. That is routine maintenance, covered step by step in our air dryer cartridge replacement guide.
Replace the complete unit when the fault is in the hardware rather than the media: a purge valve that leaks continuously or will not close, a corroded or cracked housing, a cartridge seized so hard the base is damaged getting it off, a failed heater on a non-serviceable design, or a dryer that has been flooded with oil after a compressor failure. When a compressor has passed oil downstream, cleaning the dryer alone rarely holds - fix the oil source first, then fit fresh media or a new dryer. Both complete units and cartridges cross-referenced to OE numbers are listed in the VADEN air dryer and valve range, which is the practical place to check what an OE reference maps to.
When the tag is unreadable
Corroded and painted-over dryers are normal. Identify by features instead:
- Count and photograph the ports, then measure the threads.
- Note whether the governor sits on the dryer or elsewhere.
- Check for a purge/regeneration line running to a separate small tank.
- Measure overall height and cartridge diameter, and note spin-on versus clamped.
- Record the bolt pattern and heater connector style.
- Cross-check against the chassis VIN build sheet, which gives the OEM assembly number even when the part itself is illegible.
Verify after installation
Fitment is confirmed on the truck, not in the catalogue. With the engine running from empty tanks, the system should build steadily and you should hear a short purge burst at governor cut-out, which falls in the 120-135 psi range on most systems; a fully charged system sits around 120 psi. Draw the pressure down and confirm cut-in occurs in the 100-110 psi band with no continuous hiss from the purge valve. A dryer that purges repeatedly at road speed or bleeds constantly usually points at the governor signal rather than the dryer - see our notes on governor cut-in and cut-out. Finish with a leak check at the new fittings, and confirm the low-air warning still activates around 60 psi and that spring brakes set as pressure falls into the 20-45 psi band.
Errors that cause a second trip
- Ordering from the cartridge number instead of the unit number.
- Assuming the bracket is included when the supplier number covers the bare dryer.
- Matching housing shape but not heater voltage.
- Ignoring a supersession note and fitting an early-revision purge valve.
- Fitting a unit designed for external regeneration to a chassis with no purge tank, or the reverse.
- Replacing the dryer to cure oil carryover without addressing the compressor that produced it.
Work the number first, then the hardware. An interchange list that agrees on all eight fitment points is a match; one that agrees on the number alone is a guess.

Need the part, not just the answer?
OE-grade air brake compressors and repair kits, manufactured and tested to commercial-vehicle standards.
Shop VADEN partsPublished by VADEN Original. Product links point to the manufacturer’s official catalogue. Specifications are general — always confirm figures against your vehicle’s service manual.