 airbrakecompressor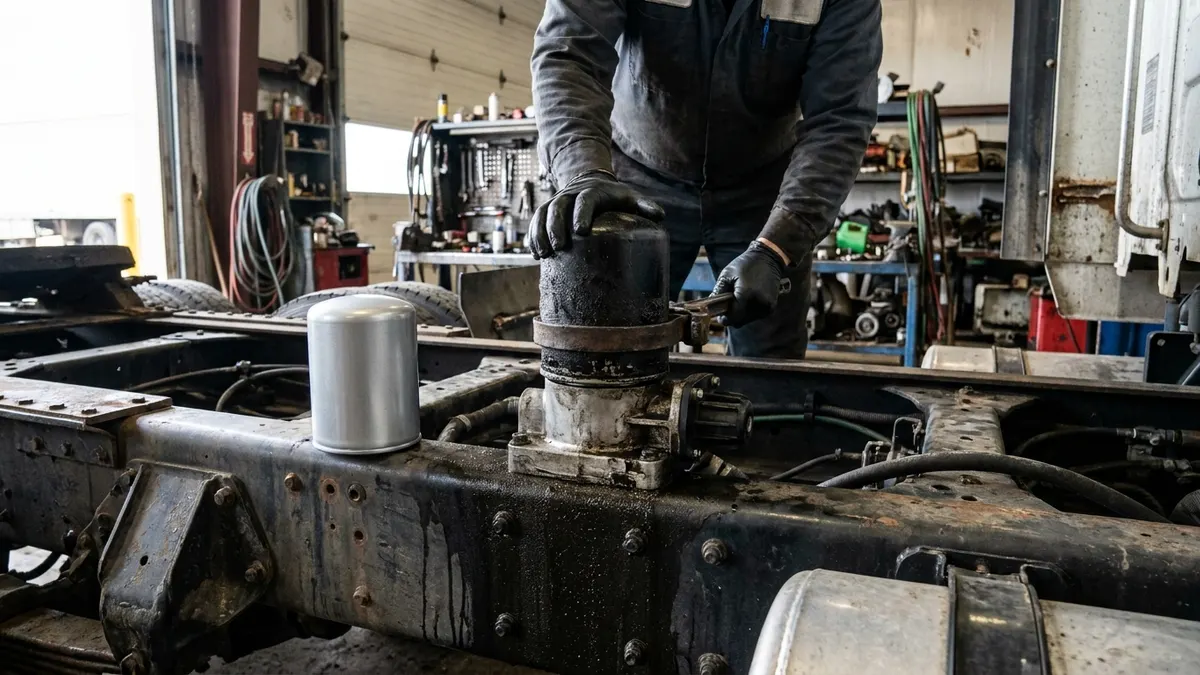
Replace the air dryer desiccant cartridge on a fixed interval — most fleets run every 12 months or roughly 100,000–150,000 miles for line-haul, and annually or sooner for stop-and-go vocational work — or immediately any time you find water in the supply tank, an oil-soaked purge discharge, or a dryer that no longer pops on every governor cut-out. The job takes 20–40 minutes on most trucks: bleed all air down to zero, unthread the spin-on cartridge, oil the new seal, hand-tighten plus the turns the manufacturer specifies, then charge and leak-check. If you are already replacing the compressor, replace the cartridge in the same visit — a new compressor pushed through a saturated dryer will cost you the compressor again.
What the cartridge actually does
The compressor delivers hot, wet, oil-carrying air into the pneumatic system. The air dryer sits between the compressor discharge and the supply (wet) tank and does three jobs: it cools the air so water condenses, it traps oil and carbon in a coalescing filter, and it passes the air over a bed of desiccant beads that pull the remaining vapor out. On the governor's unload signal, the purge valve dumps the collected water and oil out the bottom — that is the sharp hiss you hear at cut-out. A small reverse flow of dry air then strips moisture back off the beads and blows it overboard, regenerating the desiccant for the next cycle.
The desiccant does not wear out mechanically. It fails because oil coats the beads so they can no longer adsorb water, or because the beads break down into dust. Either way the dryer stops drying and starts passing wet, oily air into your tanks, valves, and brake chambers. For a fuller picture of the whole assembly, see our page on the truck air dryer.
Replacement interval
There is no single number that fits every truck. Duty cycle drives it: the harder the compressor works, the more oil and heat the desiccant sees.
| Service type | Typical cartridge interval | Why |
|---|---|---|
| Line-haul tractor, dry climate | 12 months / 100,000–150,000 miles | Low duty cycle, steady highway airflow, good cooling |
| Regional / mixed | 12 months | Moderate cycling, seasonal humidity swings |
| City transit bus, refuse, vocational | 6–12 months | Constant door, suspension, and brake demand; high compressor duty cycle |
| Humid or coastal operation | Annually, minimum | Desiccant loads with moisture far faster |
| Any truck with oil passing | With the compressor, every time | Oil-fouled beads cannot be cleaned or dried out |
Follow the OEM interval printed on the dryer if you have it. If the truck's history is unknown, treat the cartridge as due — it is one of the cheapest parts on the air system and the most expensive one to neglect.
Symptoms of a saturated or failed dryer
- Water at the tank drains. A few drops is normal. A steady stream, or a cup of water out of the supply tank, means the dryer is not doing its job. See water in air tanks for the full diagnostic path.
- No purge at cut-out. If the dryer stays silent when the governor unloads — typically somewhere in the 120–135 psi range — the purge valve, the governor signal line, or the heater circuit is at fault, and the desiccant is being ruined while you drive.
- Constant leak from the purge port. A dryer that hisses continuously is dumping supply air and making the compressor run far more than it should.
- Oil around the purge or in the tanks. Oil means either a worn compressor or a dryer that is no longer coalescing. Confirm which before you condemn a part.
- Frozen lines or valves in cold weather. Moisture downstream freezes and sticks valves. Recurring winter freeze-ups almost always trace back to a dead dryer or a failed dryer heater.
- Slow build or frequent cut-in cycles. A restricted, contaminated cartridge chokes airflow and makes a healthy system look like it has a weak compressor.
How to replace the cartridge
- Chock the wheels and drain all air. Open every tank drain and take the system to zero psi. Confirm at the dash gauges. Do not loosen anything under pressure.
- Clean the area. Wipe the dryer head and the cartridge sealing face so no grit falls into the housing.
- Remove the old cartridge. Most modern units are spin-on and come off with a strap wrench or the correct filter socket. Expect a small amount of oily water to drain out.
- Inspect the head. Check the mating surface for damage, verify the purge valve body is not weeping, and confirm the heater connector and its wiring are intact. Note the condition of the drained fluid — heavy oil means a compressor investigation.
- Prep the new cartridge. Wipe a light film of clean oil or the supplied lubricant on the new O-ring or gasket. Never install it dry.
- Install to spec. Spin it on until the seal contacts, then tighten the additional amount the manufacturer calls for — commonly a fraction of a turn up to about one full turn by hand. Do not use an impact gun.
- Charge and leak-check. Build to full pressure — a fully charged system typically sits around 120 psi — confirm the governor cuts out and the dryer purges audibly, then shut down and watch for leak-down. Soap the cartridge seal and the purge valve.
- Drain the tanks again after a day of service to see whether the new cartridge is holding the water back.
Pair the cartridge with compressor work
This is the step techs skip and pay for twice. A compressor that has been passing oil has already loaded the desiccant with oil. Bolt on a new compressor, leave the old cartridge, and the system keeps circulating that oil into the valves — while the restriction downstream raises discharge temperature and shortens the new compressor's life. The correct order of operations is: replace the compressor, replace the dryer cartridge, blow out or replace the discharge line, and drain every reservoir. A properly matched air processing unit and dryer assembly keeps discharge temperature, oil carryover, and purge timing inside the range the rest of the system was designed around.
Habits that make cartridges last
- Drain all reservoirs on a routine — daily in humid or freezing conditions. Manual draining is a backstop, not a substitute for a working dryer.
- Keep the discharge line clean and correctly routed so the air arrives cool enough to condense.
- Check the dryer heater every fall. A dead heater freezes the purge valve and kills the cartridge over one winter.
- Fix air leaks. Every leak raises compressor duty cycle, which raises heat and oil carryover straight into the desiccant.
- Log the change. Write the date and mileage on the cartridge with a paint marker so the next tech is not guessing. Fold it into your broader air compressor maintenance schedule.
A cartridge is a cheap part. The valves, chambers, and compressor it protects are not. When in doubt, change it.
Source (VADEN Original): Air Dryer Cartridge and Moisture Management: Selection, Service Life and Winter Conditions

Need the part, not just the answer?
OE-grade air brake compressors and repair kits, manufactured and tested to commercial-vehicle standards.
Shop VADEN partsPublished by VADEN Original. Product links point to the manufacturer’s official catalogue. Specifications are general — always confirm figures against your vehicle’s service manual.