 airbrakecompressor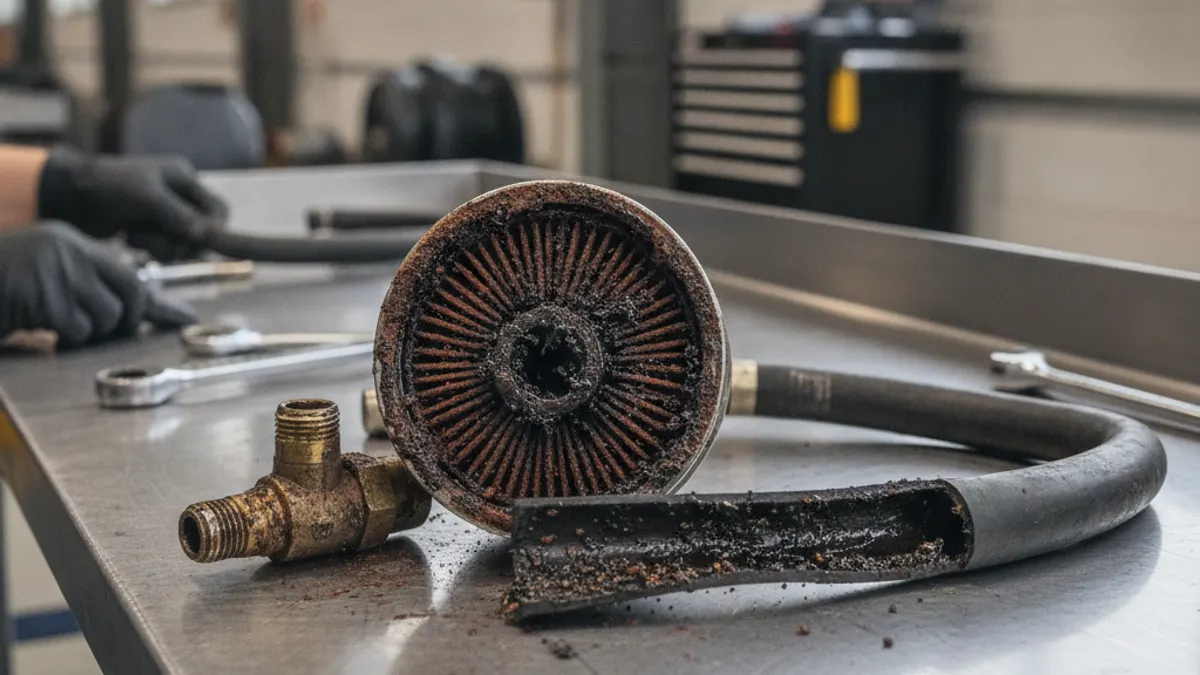
When an air compressor fails and pushes oil downstream, the contamination does not stop at the compressor. It coats the discharge line, saturates the air dryer desiccant, pools in the reservoirs and works its way into the valves and brake chambers. Cleaning it up means replacing the discharge line and the dryer cartridge, draining and flushing the tanks, and inspecting or replacing any downstream valve whose rubber has swollen. Bolting on a new compressor without decontaminating the system is the most common reason the replacement fails again within weeks.
What contamination actually means in an air system
Every reciprocating air brake compressor passes a trace of oil, and the air dryer is designed to handle it. Contamination is what happens when that trickle becomes a flow, usually from worn rings, scored cylinder walls, a failed head gasket, or a compressor running an excessive duty cycle because of a leak.
Three things are then moving through the plumbing at once:
- Liquid engine oil swells and softens nitrile diaphragms, O-rings and valve seats, which shows up as slow release, leaks and sticking valves.
- Carbonized oil bakes onto the hot discharge line and dryer inlet, restricting flow, raising discharge temperature and killing the next compressor.
- Water and emulsion follow once the desiccant is oil-fouled and stops drying. Moisture mixes with the oil into a gray sludge in the tanks, which freezes in valves and lines in winter.
If you are still diagnosing the source rather than cleaning up after it, start with why an air brake compressor pumps oil. Fixing the cause first is what keeps the decontamination from being wasted labor.
How far did it get? Judging the severity
Before deciding how deep to go, drain the supply (wet) tank into a clear container and open the dryer purge. What comes out sets the scope of the job.
| What you find | Severity | Scope of work |
|---|---|---|
| Clear water, faint oil film | Normal | Routine drain, dryer cartridge on schedule |
| Milky emulsion, measurable oil in the wet tank | Moderate | Discharge line, dryer cartridge, tank drain and flush, check valves |
| Free oil in the secondary or service tanks, or at a brake chamber | Severe | Full decontamination: lines, dryer, tanks, valves, chambers |
| Oil at the trailer gladhands or ABS modulator | Severe | As above, plus trailer plumbing and modulators |
Oil past the wet tank is the dividing line. Once it reaches the service reservoirs, every delivery valve, the relay valve and the chambers sit downstream of it and none can be assumed clean.
Decontamination procedure, step by step
- Fix the source first. Replace or rebuild the compressor, or correct the leak that drove the duty cycle up. Cleaning a system that is still being fed oil accomplishes nothing.
- Chock the wheels and drain the system fully. Spring brakes apply as pressure falls into roughly the 20 to 45 psi range, so the vehicle must be chocked and secured before you exhaust the tanks.
- Replace the discharge line. Do not try to clean it. Baked-on carbon inside the bore cannot be reliably removed and will break loose later. Fit the correct line for the application and route it without low spots, kinks or sharp bends that trap condensate.
- Service the air dryer. Replace the desiccant cartridge as a minimum, and replace the complete dryer if the housing, purge valve or check valve is oil-logged. Oil-fouled desiccant does not recover.
- Drain, flush and dry the reservoirs. Remove the drain valves, flush each tank with clean water or an approved aqueous cleaner, rinse and dry with clean shop air. Check for internal corrosion while the ports are open; a tank with heavy scale gets replaced, not flushed.
- Replace check valves and inspect the governor. Single check valves and the safety valve are cheap and are common holding spots for sludge. A governor with an oil-swollen piston seal gives erratic cut-out.
- Work through the downstream valves. Replace nylon lines that show oil inside, then inspect the relay valve, foot valve, quick-release valve and dash control valves. Any valve with a swollen, tacky or distorted diaphragm gets replaced, not washed.
- Check the brake chambers. Oil attacks the diaphragm from the pressure side, so replace any chamber showing oil at the port or a soft diaphragm.
- Recharge and leak-test. Build to a normal fully charged pressure of around 120 psi, confirm the governor cuts out in the 120 to 135 psi band and cuts back in around 100 to 110 psi, and check that the low-air warning operates near 60 psi. Exact figures follow the vehicle manufacturer's current service manual.
What to replace and what to clean
| Component | Action | Why |
|---|---|---|
| Compressor discharge line | Replace | Carbon deposits cannot be cleaned out; restriction overheats the new compressor |
| Air dryer desiccant cartridge | Replace | Oil-saturated desiccant loses drying capacity permanently |
| Air dryer body and purge valve | Inspect, replace if oil-logged | Sludge blocks the purge circuit and the turbo cut-off port |
| Reservoirs, wet and service | Drain, flush, dry | Tanks hold the oil and emulsion that re-contaminates everything else |
| Check valves and safety valve | Replace | Small seats stick with sludge; low cost against a repeat failure |
| Governor | Inspect, replace if swollen | Swollen seals cause erratic cut-out and constant compressor loading |
| Relay, foot and quick-release valves | Replace if diaphragms are swollen | Distorted rubber causes slow apply and brake drag |
| Brake chambers | Replace if oil-wet | Oil degrades the diaphragm and can cause rupture |
Never flush an air system with solvent
Mineral spirits, brake cleaner, diesel and carburetor cleaner have no place in an air brake system. They leave a residue that keeps attacking nitrile and EPDM seals long after the job is done, and they carry into components that were still clean. Use water or a manufacturer-approved aqueous cleaner on the tanks only, rinse completely, dry with clean air, and replace anything you cannot verify. Do not add alcohol evaporators or dryer chemicals to a system with an air dryer fitted either, because alcohol strips the desiccant.
Rule of thumb: rubber that has seen liquid oil gets replaced, metal that has seen liquid oil gets flushed, and anything with baked carbon gets replaced.
Verifying the cleanup held
Do not close the file on the vehicle the day it leaves the shop. Drain each reservoir at the next service and again after two to four weeks of normal duty; the wet tank should give up clear condensate with no more than a faint film. Oil reappearing at the dryer purge within a few hundred miles means either the compressor is still passing oil or you missed a restriction in the discharge plumbing.
Time the build-up from cut-in to cut-out at that follow-up as well. A system that builds noticeably slower than it did at handover usually has a partly plugged dryer or a check valve gumming up again.
Keeping it from happening again
Most contamination events trace back to something ordinary: a leak that kept the compressor loaded far beyond its designed duty cycle, a dryer cartridge left well past its interval, or tanks that were never drained. Draining every reservoir daily, replacing the air dryer cartridge on schedule and chasing leaks as soon as build-up time starts creeping are what keep oil and moisture out of the plumbing. If condensate keeps appearing despite a healthy dryer, see water in the air tanks.
On modern trucks the compressor, governor, dryer and purge circuit are often supplied as one assembly, so a contamination job may mean renewing the whole module rather than individual valves. VADEN Original manufactures OE-grade air processing units and dryer assemblies for heavy commercial vehicles, which is the practical route when the housing itself is oil-logged.
Decontamination adds hours to a compressor job and it is the part fleets are most tempted to skip. It is also the difference between a repair that lasts and the same vehicle back on the hoist next month.

Need the part, not just the answer?
OE-grade air brake compressors and repair kits, manufactured and tested to commercial-vehicle standards.
Shop VADEN partsPublished by VADEN Original. Product links point to the manufacturer’s official catalogue. Specifications are general — always confirm figures against your vehicle’s service manual.