 airbrakecompressor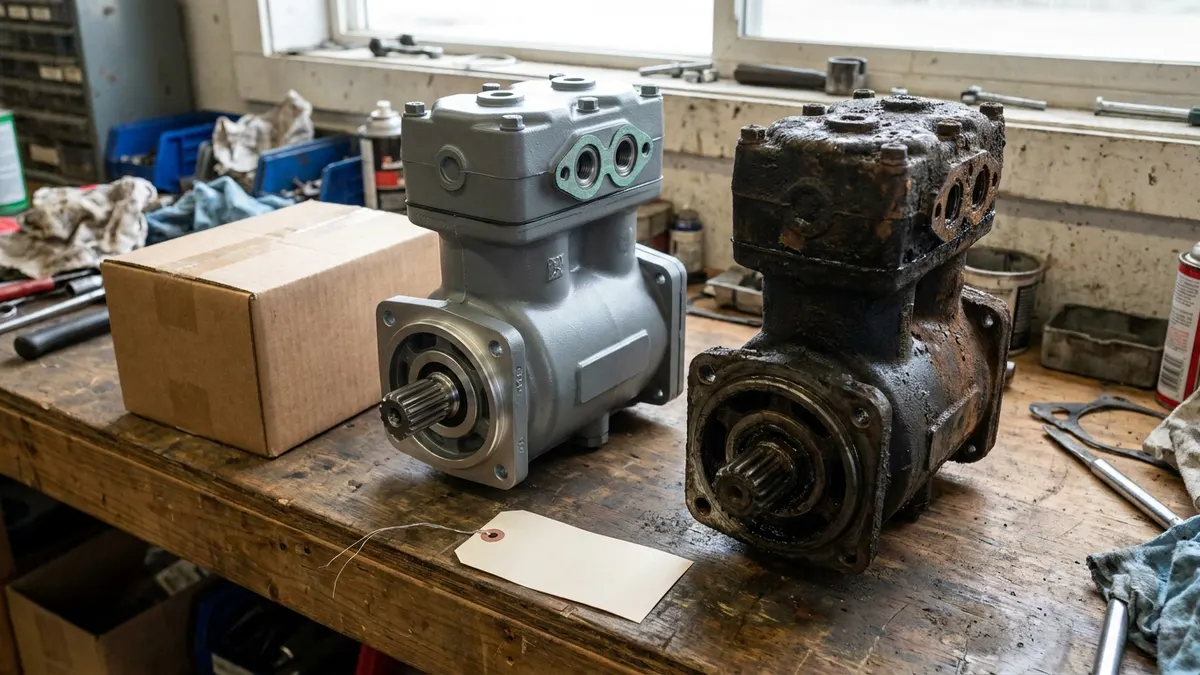
A repair kit is the cheaper option only when the failure is confined to wear parts - unloader seals, valve plate and discharge valves, gaskets, piston rings - and the casting, crankshaft and cylinder bore are still serviceable. Parts-only, a kit costs a fraction of a new compressor, but the labor to pull and refit the unit is virtually the same either way, so the honest question is not "which part is cheaper" but "will this rebuild last as long as a replacement." When the compressor is knocking, the bore is scored, or it is on its second failure, replacement almost always wins on cost per mile.
Cost at a glance
Treat the figures below as ratios rather than quotes. Actual pricing swings with market, engine family, and whether the unit is a single-cylinder compressor or a high-displacement twin. Labor hours assume a shop rate and an average-access installation; a compressor buried behind an air conditioning compressor or a fuel filter housing can easily double the book time.
| Route | Indicative parts cost | Typical labor | Realistic service life |
|---|---|---|---|
| Unloader / valve plate kit only | Lowest | 0.5-1.5 h if the head is serviceable in the chassis | Full remaining life of the compressor if the bottom end is sound |
| Full overhaul kit (rings, valves, unloader, gaskets, seals) | Roughly 20-35% of a new unit | 3-6 h including removal, bench work and refit | Good, provided bore and crank measure within OE tolerance |
| Reman exchange compressor | Roughly 50-70% of new | 2-4 h | Depends entirely on the remanufacturer's core standards |
| New OE-grade compressor | Highest | 2-4 h | Full design life, with warranty cover |
What a repair kit actually replaces
Air brake compressors are engine-driven and turn whenever the engine turns. They do not stop at cut-out; the governor signals the unloader mechanism to hold the intake open so the compressor idles against no load. That means the unloader assembly cycles constantly, and its seals and the discharge valve seats are the first things to give up. A typical kit therefore covers the unloader pistons and seals, discharge and inlet valves or a complete valve plate, head and base gaskets, O-rings, and on fuller kits, piston rings and the crankshaft seal. Suppliers of OE-grade air brake compressor repair kits generally group them by the same OE part families used by Bendix, Wabco, Knorr-Bremse and the engine builders, so cross-referencing off the compressor casting number is straightforward. For a component-by-component breakdown, see what comes in an air compressor repair kit.
What a kit cannot fix
- A scored, tapered or out-of-round cylinder bore - new rings in a worn bore will pump oil again within months.
- Worn crankshaft or connecting-rod bearings, which is what most compressor knock turns out to be.
- A cracked head or crankcase, or a warped deck face that has already been skimmed once.
- Seized or heat-blued components from a coolant loss or an oil supply restriction.
- A worn drive gear, coupling or pulley bore.
Labor is the number that decides it
On most heavy trucks, removing the compressor means draining coolant, disconnecting oil feed and return lines, the discharge line, the governor signal line, and either the gear cover or a belt drive. That work is identical whether you are fitting a kit or a complete unit. So if a full overhaul costs three hours of bench time on top of the removal, and the rebuilt unit carries no warranty, the price gap against a new compressor narrows fast. The exception is the on-vehicle unloader or valve plate repair: if the head can be lifted without pulling the compressor, a kit is unbeatable value and often a same-day fix. Our fuller comparison of rebuilding versus replacing an air compressor walks through the inspection steps.
Decide by failure mode
| Symptom or finding | Usual cause | Best-value fix |
|---|---|---|
| Slow build-up, governor never reaches cut-out | Leaking unloader seals, worn discharge valves, or a faulty governor | Test the governor first, then fit an unloader or valve plate kit |
| Compressor loads again immediately after cut-out | Air leaking back past the discharge valve or a bad check valve | Valve plate kit |
| Oil in the air dryer purge, oily tanks and valves | Worn rings and bore, or a restricted discharge line | Measure the bore; overhaul only if in spec, otherwise replace |
| Metallic knock under load | Rod or main bearing wear | Replace the compressor |
| Coolant loss with no external leak, milky crankcase oil | Failed head gasket or cracked head | Head gasket kit if the head passes a pressure test, otherwise replace |
| Seized, cracked casting, or damaged drive | Terminal failure | Replace, and inspect the drive gear and oil feed before fitting |
Decide by mileage and duty cycle
Mileage alone is a weak signal, because duty cycle drives compressor wear far harder than distance. A linehaul tractor with a healthy air dryer and few auxiliary air consumers may reach very high mileage on the original unit; a mixer, refuse truck or coach with air suspension, air doors and constant service brake applications works its compressor several times as hard over the same odometer reading. Two practical rules hold up in the field. First, a compressor in the first half of its expected life with a clean bore is a good rebuild candidate. Second, once a unit has had one repair and fails again, stop feeding it - the second rebuild rarely returns the labor invested. High-hour vocational units and anything that has run hot should go straight to replacement.
Hidden costs that flip the math
- Discharge line carbon. An oil-pumping compressor cokes the discharge line and raises head temperature. Replacing or cleaning that line is mandatory with either repair, and skipping it kills the new parts.
- Air dryer cartridge and contaminated tanks. Oil carryover ruins the desiccant and coats downstream valves. Budget a cartridge, tank drain and, in bad cases, a system decontamination.
- Downtime. A day off the road usually outweighs the parts difference between a kit and a new unit.
- Warranty. A new compressor carries cover; your own bench rebuild does not.
For the full installed-price picture, including the ancillary parts most estimates leave out, see the air brake compressor replacement cost breakdown.
A decision sequence you can run in the bay
- Confirm the compressor is actually the fault. Check for system leaks and verify governor operation - cut-out should land in the 120-135 psi band and cut-in around 100-110 psi, with a fully charged system sitting near 120 psi.
- Run a build-up test at governed rpm against the OEM figure in the service manual, and note whether the low-air warning clears as expected around 60 psi.
- Crack the discharge line at the compressor. Heavy carbon or wet oil points at ring and bore wear, not the unloader.
- If the head comes off in the chassis and the bore looks clean, fit a valve plate and unloader kit and retest.
- If the unit must come out anyway, measure the bore and check the crank end float on the bench before ordering an overhaul kit.
- Out of spec, knocking, cracked, or previously repaired - fit a new or reman unit and replace the discharge line and dryer cartridge with it.
Whichever path you choose, finish the job the same way: build the system to cut-out, watch that the compressor unloads cleanly, drain the tanks after a shift to see whether oil is still coming through, and confirm the spring brakes release normally in the 20-45 psi range on the way back up.

Need the part, not just the answer?
OE-grade air brake compressors and repair kits, manufactured and tested to commercial-vehicle standards.
Shop VADEN partsPublished by VADEN Original. Product links point to the manufacturer’s official catalogue. Specifications are general — always confirm figures against your vehicle’s service manual.